 Don’t be fooled by those beautiful pictures of artfully created pies on Pinterest. They are FAKE!!! Have you ever noticed that they never show them after they are baked?
 (All links open a new page, so you won’t lose your spot when you look around! Get information on gardening and cultural traditions, recipes, stories, and more!)
Part of the reason that you can tell their fakeness is that the dough is all uniform in color and texture. Not only that, but the amount of rolling and manipulating of the dough, along with the time it would be sitting and waiting, guarantee that you wouldn’t want to eat it afterwards, and not because of how pretty it would be. For one, the appearance will change as the dough browns and shrinks, and then it would be very tough. No thanks.
 This does not mean that your pie has to be plain. A few easy steps is all that is needed to have a pretty pie that will still impress, while giving you a superb crust that will leave everyone raving for more. The biggest things to watch for is to have marbling in your dough and to not overwork it. It’s pie crust, not bread. You want flaky, not tough, and overworked dough without fat blotches is a sure fire way to get tough dough.
 One other tip, use salted butter, not plain butter or shortening. I’ve been using salted butter for years, long before it became a fad. Think about it, recipes tell you to use unsalted butter then say to add salt. ???? Also, butter has moisture that shortening doesn’t have, and when that moisture heats up it creates steam that allows for the layers of dough to become flaky. It does mean your crust will shrink a little, but the flavor and texture is far superior.

Perfect Pie Dough Recipe
Ingredients
- 2 c. all-purpose flour
- 13 Tbsp. chilled salted butter (yes, salted), cut into pieces
- 6-8 Tbsp. ice water
Directions
Using a food processor will make this job much easier. Put half the flour, then half the butter, then the rest of the flour and then the remaining butter. This allows for the mixture to be more uniform. Pulse the processor until the butter is in small pea-sized pieces in the flour. Any really large pieces can be cut up with a knife. You do not want too small of butter chunks! If you don’t have a processor, you will need to cut the butter into the flour with a pastry cutter or with a knife.
Remove the mixture from the processor into a bowl. Add the water one tablespoon at a time, gently mixing by tossing the ingredients around in between each addition. Don’t add more than six tablespoons, yet. If the mixture can hold its shape when pressed into a ball, you are done. If not, just dribble in enough water until it does. Again, don’t overmix, but also don’t over water. Too much water leads to a tough dough. I usually never need more than seven tablespoons.
 Gently form a ball and then flatten it a little. Wrap it up in plastic and let it chill for about 30 minutes in the refrigerator. This gives time for the water to be absorbed better and to harden the butter again so your crust bakes and not fries in the oven.
Use a pastry mat or tape parchment paper firmly to a smooth surface for rolling out your dough. Lightly sprinkle the surface of the mat, your rolling pin, and the surface of the dough with flour. Divide the dough in half. Gently roll out each half of the dough from the center out in all directions to get a round shape. You will need to occasionally re-flour the surface **sparingly** to keep the dough from sticking. A wide, flat plastic (metal may tear or scratch surfaces) spatula is perfect for helping to loosen stuck dough. I will usually flip the dough over the rolling pin, flour the surface, then lay the dough back down so that the underside is now on top. This distributes added flour better and evens out the rolling action on the dough. Roll out to a thickness of 1/8 to 1/4 inch, too thick will take too long to bake and will also get too tough.
Once your dough is the size you need, set your rolling pin towards one edge and gently flip it over your pin. Roll your pin away from the edge and carefully pull the dough over the top until it is halfway over (see the pictures). Lift the pin up while balancing the dough and then transfer the dough over your pie pan. Tuck the dough into the pan. Trim any edges of the dough that are stick out more than an inch. These trimmings can be pasted in with a little water to fix any spots that don’t have enough dough hanging over, or any holes that may have occurred while transferring. If you zoom in on the pictures of the dough in the pan, you will see where I patched a short spot in the upper left picture at the bottom of the image.
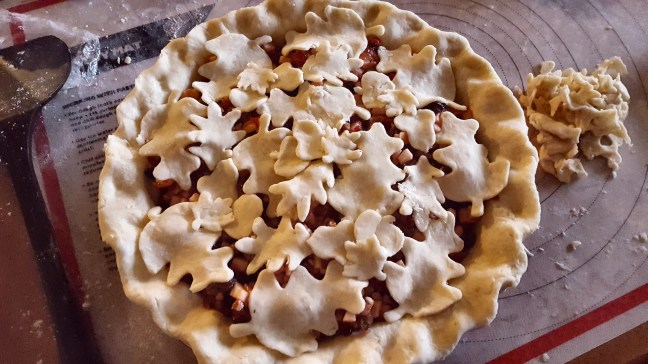
Fold the edges of the dough under so that they just extend beyond the edge of the pan. At this point you can do all sorts of patterns to decorate the edges of the pie. I usually stick to fluting the edge between my thumb and forefinger. As for decorating the top, you have a couple of easy options that use cookie cutters for a pretty look without too much time. You can roll out the dough as above and just cut out a few shapes to allow steam to vent, then lay it on top of your pie filling using the same method for the bottom. Or you can cut several shapes and lay them on top in a nice pattern, which is what I did for the pie in the pictures. If your kitchen is warm, you may need to put the pie pan with the dough in the refrigerator to keep it chilled while you prepare the top crust.
Since this dough is made with only butter, it will brown on its own, so there is no need for an egg wash. I like to sprinkle a little sugar over the surface for looks and flavor, but it isn’t necessary, either. If the edges of your pie start to brown a little too fast before the rest is baked, you may want to put a strip of foil around the edge of the pie to protect it. Follow the directions from your pie recipe for time and temperature for finishing the rest of the pie. Happy baking!


9 thoughts on “Perfect Pie Dough”