 One of the greatest things about the World Wide Web is that it allows for fortuitous discoveries to be made in a matter of seconds with just a few keystrokes. This “cheese” happened to be just that for me.
 (All links open a new page, so you won’t lose your spot when you look around! Get information on gardening and cultural traditions, recipes, stories, and more!)
Over the years I have done a lot of exploration into the origins of foods and how they used to be made before modern techniques became available. Some modern foods you’ll never be able to recreate at home, but so many others started hundreds and even thousands of years ago. Pretty sure I can do those!
 However, some of those food making processes lead to by-products that aren’t as tasty, at least not as-is. I’ve found uses for some (like leftover whey from making Greek yogurt to make Greek mizithra cheese, and random kitchen scraps to be a soil conditioner for acid-loving plants), but I’m frequently on the lookout for ways to reduce that waste. As I’ve done more research, I have found that I am certainly not alone.
 The irony is that one of the things I use a leftover for creates even more leftovers! The whey that is drained from yogurt or other cheese for making traditional mizithra leads to even more whey being drained out from the cheese itself. Even if you make the “cheater’s” version of mizithra, you’ll still be left with a lot of drained liquid, and this is a common problem no matter what type of cheese you might make.
 As it turns out, people in ancient Europe had figured out a means of using these leftovers but it became a lost art over time. That is, until a young woman in Norway, by the name of Anne Hov, who was looking for an income source figured out that same ancient process for turning discard into food. And tasty food at that. The result is brunost, a cheese-like substance that is slightly sweet, just a hint of salty, with a soft chocolate kind of texture.
There are many variations of Brunost, none of which are true cheeses, but are called “cheese” since they are made with milk products. They differ in taste and name based on whether goat or cow (or both) milk whey is used, if and what type of whole milk is added, and the quantity of cream used.
I decided to experiment using the whey left over from making Mizithra, which would be a “sour” whey due to the addition of acids to curdle more of the proteins in the milk for making cheese. This would not be considered a true Brunost, but the end product is similar in texture and still has a great flavor mix of sweet, salty, and just a hint of sour. Sour whey will typically have less protein and sugars but there’s enough present to work with. The recipe below is an easy starting point that you can do your own experimentation with!
Some quick notes before you begin:
Brunost is traditionally made with “sweet” whey, which comes from cheese made with rennet. The whey contains proteins that don’t solidify during cheese making, and has the natural milk sugars. True brunost will then have a more cheese-like texture and sweeter flavor
Yogurt or other fermented dairy products use bacterial cultures that will have consumed the milk sugars and produced lactic acid (hence the sour taste) that will be present in the strained off whey. Whey left behind from making mizithra or ricotta (both use a similar process), made either by the traditional or the “quick” way with lemon juice or vinegar, will have more of those sugars but have the added acidity. Either way, adding sugar during the cooking process will override the acids. The end color is lighter than traditional brunost since the acid prevents the browning that would occur with “sweet” whey. The texture is also less cheese-like and more like a soft chocolate since there are fewer proteins left in the whey.
The process involves cooking down the whey until it is reduced by roughly 80%. The amount of whey you have will determine the size of pot or pan needed. Cookware with wide bases and short sides will speed this process up greatly. If you have a lot of whey you want to process, breaking it up into smaller batches will greatly reduce your overall time and energy used. Trust me, even doing multiple small batches will be faster than one large batch!
Caramelized 'Sour' Whey Recipe
Ingredients
- 2 quarts sour whey (from strained yogurt or from making whey cheese like mizithra or ricotta, be sure to use whey that hasn’t had salt added)
- 1/2 cup heavy cream
- 3-4 tsp. or more granulated sugar (can adjust as desired for preferred sweetness, this will make a lightly sweet product)
Directions
Bring the whey and sugar to a boil on high heat. Adjust the heat as needed to keep it from boiling over the edge of the pot/pan. Use a flat edged utensil to push the whey around and to prevent any scorching on the bottom. Moving it around also helps to speed up the evaporation of the water.
Continue to cook the whey until it has started to change color to a yellow-brown hue and has reduced by more than half. Add the cream and quickly mix in until completely blended. Turn the heat down to low and keep stirring until the mixture thickens to the texture of melted chocolate.
Immediately remove your pan from the heat and quickly transfer the mixture to a bowl. At this time you will need to stir, stir, stir, stir. Don’t stop! Keep stirring the mixture until it cools and thickens. It will become less glossy in appearance and will be like melted caramel in texture. The reason for the constant stirring is to avoid the formation of crystals. It’s not that it’s bad, but it does give a gritty texture.
Stop stirring at this point before it hardens completely. If it hardens, you can gently heat it with a little additional cream until soft again, otherwise it will be very crumbly. You can put it into a mold if you want or shape it into a ball when it is firm enough to hold its shape. If you use a mold, be sure to lightly oil it to help release it if it is not non-stick.
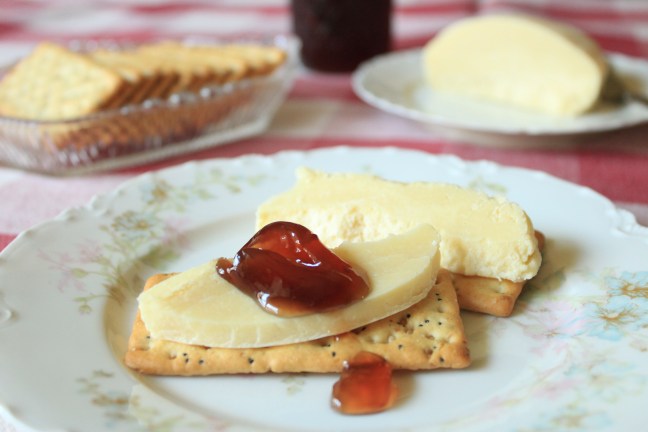
I keep my caramelized whey refrigerated, but it has a better texture that’s easier to cut and spread if it is allowed to come to room temperature. I find it best to enjoy it the way the Norwegians do, by putting it onto crackers or bread with a tasty jam or jelly. My understanding is that raspberry jam is commonly used, but I had some of my pomegranate jelly on hand and it was scrumptious! Enjoy!


Thanks for the recipe. I was just wondering; why is your cheese so white in colour on the pictures? I mean, brown cheese is really brown coloured. I was just wondering – not critiquing.
LikeLike
The whey I used was from yogurt and so it has a lower pH. The acidity prevents the kind of browning that would develop if I had used whey from cultured cheese making. 😊
LikeLike