 Most of what you find in the grocery store that claims to be Greek Yogurt is really Greek-style yogurt. Big difference. Real Greek yogurt is made with certain strains of bacteria that lend a less tart flavor, and the final product is strained to remove the whey creating that thick and creamy texture Greek Yogurt is so famous for. Greek-style yogurt often uses the same cultures as “regular” yogurt and is thickened with things like pectin or gelatin. This is especially done for fat-free Greek yogurt, four words that really just shouldn’t be allowed to exist together. It’s not bad, it’s just not right. So let’s do it right!
Read the backstory to Greek yogurt making here.
 The first step seems ironic… you’ve got to get some Greek yogurt. You need this for your starting source of the bacteria. Pick one that has only dairy and bacterial cultures in the ingredients. Look for L.bulgaricus and S.thermophilus to be near the front of the list. No flavors or sugars added as these products tend not to contain enough live cultures and can prevent new ones from growing.
(All links open a new page, so you won’t lose your spot when you look around! Get information on gardening and cultural traditions, recipes, stories, and more!)
 You’ll also need a yogurt incubator. I prefer having a single, larger container rather than several smaller jars. You get more flexibility: make a lot or a little, and less containers to fuss with.
Greek Yogurt Recipe
Ingredients
To make one quart unstrained yogurt:- ½ c yogurt starter
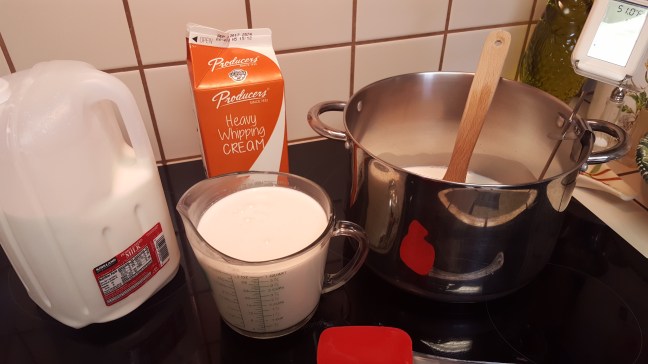
- ½ c heavy cream
- 3 ½ c whole milk
- ½ c powdered milk (optional, it gives a less-watery result and boosts protein and other nutrient content)
Directions
Depending on your incubator’s instructions, you should put your starter in and allow it to start warming up while carrying out the next steps.Mix the heavy cream, powdered milk (if using), and milk in a large pot. Place the pot on the stove and turn to high. The trick with heating milk is to keep it moving continuously. I like to use a flat paddle for stirring and run it along the bottom of the pan to keep the milk from scorching. This can be about 5-10 minutes.
Using a thermometer and stirring constantly, bring milk up to 180 oF and quickly remove from heat. Continue to stir off-and-on until the mixture cools to 110-115 oF. This will take 15-20 minutes.
 Add the cooled milk mixture a little at a time to your warmed starter in the container for your yogurt maker. Gently stir to mix evenly. Repeat until all the milk mixture is used. Place the container into your incubator according to the manufacturer’s instructions.
Incubate for at least 6 hours, but not more than 24 hours. Less time creates a more mellow flavor, but the end result will be very loose and liquid-y. More time creates a firmer, but much more tart product. My preferred time is between 8-10 hours.
Place your container in the refrigerator for several hours to cool after the incubation is done. This allows your yogurt to set up more firmly. BEFORE YOU EAT ANY make sure to take out ½ c of your yogurt to be your starter for the next batch! Keep your starter in the refrigerator, tightly sealed. I have neglected mine for up to three weeks, but after that it’s pretty much a loss. Don’t use yours if it has any sign of mold, odd smell, or funny colors. Just start over again.
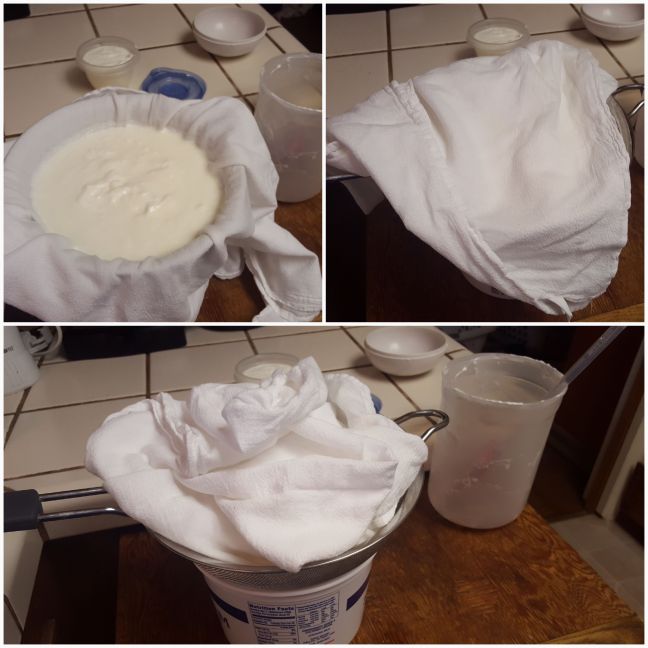
Your yogurt won’t be the same as commercial yogurt because it doesn’t have added thickeners like pectin or gelatin. It also won’t be anywhere near the consistency of Greek yogurt… yet. The next step is to strain your yogurt. Use a strainer lined with a clean muslin cloth, or a few layers of cheese cloth, and place it over a container. Pour your yogurt into the strainer and cover with the edges of the cloth. Place it into the refrigerator until enough whey has drained from the yogurt to give you the consistency you want. I like mine thick so I usually let it set overnight.
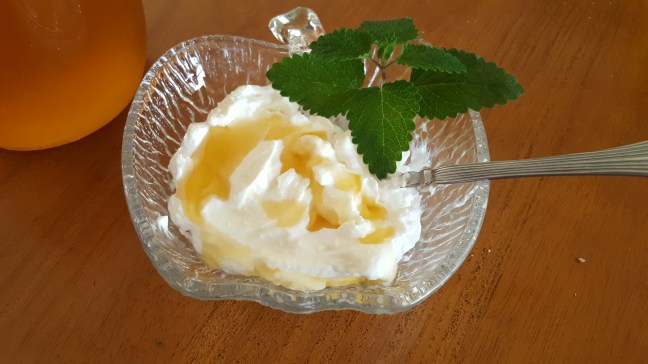
 At this point carefully dump your thickened yogurt into a container and enjoy! The cloth will easily peel off the thickened yogurt. Topped with fresh berries and/or sliced fruit and a drizzle of honey, you have a delectable treat worthy of the gods!
DON’T DUMP YOUR DRAINED LIQUID! It is a nutritious treat for any acid loving plants in your yard. I dilute it down with a bit of water and give it to my blueberries. They love it!


Great site. Just had a quick read.
LikeLiked by 1 person
Good day. This is so interesting, but what about us without an incubator please? I have never even seen one in any shop in Australia
LikeLiked by 1 person
They are not a common item in stores here, either. Your best bet will be to look online for one. You could also warm your oven up just a little, about 110 F, and have your mixture in a covered pot. Most ovens won’t go that low so you would need to turn it on for a couple of minutes, then turn it off, and repeat that every once in a while to keep the oven warm enough. It’s tedious, but it will work.
LikeLike
Hi Dorie, thank you for taking the time to write about making Greek yogurt.
I have several observations to make:
Traditional Greek yogurt is made with GOAT milk. It was made in smallholding households, which typically had a kitchen garden, some chickens, and a nanny goat or two. But cows were out of the question because they need pasture and that wasn’t available in a typical smallholding.
Traditional Greek yogurt had far more active cultures than what’s in commercial dairy yogurt. Commercial yogurt is always made from very specific strains (which ones depend on the dairy) that are tested and (in the US) FDA-approved.
Traditional Greek yogurt, being made in the home, used a bit of the previous batch as starter. Over time new strains get picked up from the environment, so the strains in daughter’s yogurt will not be an exact duplicate of her mother’s.
Some strains have never been in popular commercial yogurts but were always in homemade yogurts. As an example, L. Reuteri is a strain that has been in the human diet for thousands of years and several specific subspecies were very common in the human gut. But due to the increasing popularity of C-Section births, lack of breast feeding, heavy use of antibiotics, and lack of encountering it anymore in food (because it’s all commercially made), many people lack them. These subspecies have been shown to protect the gut, help prevent “leaky gut”, and provide many other benefits throughout the body.
Remember, this is just ONE example — there are many more.
In summary, this is a plea for getting back to making food from scratch because it’s the only food that’s “real”. Commercially-made foods lack many components needed for a life-long (and long-life) diet because, for safety’s sake, it contains only ingredients that have been studied and approved for consumption. And we haven’t studied everything yet.
LikeLike