 One of my fondest childhood memories is going into my grandparents’ back yard looking for ripe blackberries on their vine. In December. Kind of didn’t understand plants back then.
 If I was lucky enough to be there when the berries actually were ripe (June, not December), I would be treated to a bowl full of them. If I was even luckier, my grandma would step out of the kitchen and my grandpa would then put a couple of spoons-full of sugar over them from the sugar bowl. If I was luckiest, she wouldn’t come back in until I’d eaten them all. Ah, good times. Good times.
(All links open a new page, so you won’t lose your spot when you look around! Get information on gardening and cultural traditions, recipes, stories, and more!)
 Now my boys get to have similar experiences (sans sugar, I hope!). My parents have a LOT of blackberry and boysenberry brambles and every summer we scout for the ripe ones. Combined with our own berries, we wind up with a lot of the tasty, yet sadly, very seedy treats.
 Hence the seedless jam. I love the flavor, but I am NO fan of picking seeds out of the crevices of my teeth for hours on end. If you have a secret variety of bramble berry (like Ollalie, Boysen, Raspberry, Blackberry, etc.) that has few to no seeds please share your knowledge! Getting the seeds out for this jam recipe does add a little more time (not much, I promise!), but it’s worthwhile. If you don’t mind the seeds, you can skip some of the steps below, but I will question whether you really mean it.
 Some quick notes before you begin:
You can start with either fresh or frozen berries. I usually have frozen since the berries are gathered over time until there are enough to work with (especially after hungry little boys and an Old Man nibble on them!). This particular recipe was geared more for the various types of blackberries and their hybrids, not so much for blueberries, raspberries or strawberries.
 This recipe also has no added pectin. I don’t use it for any of my jams and jellies, as I’ve had far more failures than successes, and I prefer the flavor of preserves made without it. The berries have enough of their own pectin, anyway, so that makes things easier!
Speaking of making things easier, this process can be broken up over different days if time is an issue! The points that you can stop and start again are in the recipe below.
If you are new to canning, you should also read my post on Food Canning 101. This goes over the basics of equipment and resources that you’ll find helpful.
I have created a post that gives all the information needed for those of you that may be brand new to making jams and jellies. It also has tips for those of you who may have struggled getting good results in the past. I have removed all that information from the original instructions below, just to make things less cluttered. Check that post out here!
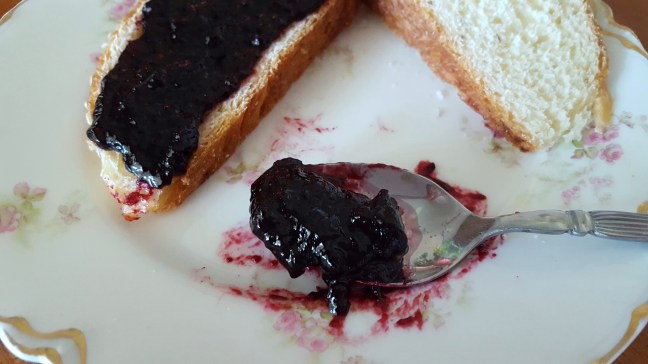
Old-Fashioned Seedless Blackberry Jam Recipe
Directions
You will want to start with at least 2 quarts of berries, either fresh or frozen. Measure the frozen berries before they defrost, then allow them to come to room temperature in a bowl to collect the juices that are released.Whether fresh or frozen, the berries will need to be cooked a little to soften them to make seed removal easier and more productive. Place the berries in a pot, add about 1/2 cup of water if using fresh berries, and heat until the berries become soft. The frozen berries could also be heated in their own juices in the microwave, instead.
Place the softened berries into a food mill set with a screen with holes small enough to block the seeds. Place the food mill over a bowl, and start cranking away! Be sure to scrape the bottom of the mill to keep the pulp. Set the seed mess aside, don’t toss it, yet!
After you have collected your berry goo, heat some water to boiling. You will add this water to the seeds, so the amount you use will depend on how much seed pulp you have. I had about 2 cups of seed pulp and used about 3/4 cup of water. There is still a lot of juice and material stuck to the seeds and this will let you extract more of it. This step is optional, but does help capture more of the berry flavor. Stir the water and seed pulp mixture around and then place it into a strainer set over a bowl. Stir the seed mix around to release as much liquid as you can. Add the liquid to the rest of the blackberry pulp you strained out. The seed mush is now ready for the compost!!
**At this point you could put your berry goo into the refrigerator or freezer for using later if you don’t want to finish the jelly making process right away.**
For every cup of berry pulp/liquid that you capture you will need:
- 1/3 – 1/2 cup granulated sugar (use less if the berries are sweet, more if they are tart)
- 1 1/4 tsp. lemon juice
You shouldn’t process more than 4 cups of the liquid (measured before adding lemon juice and sugar) at a time unless you have a larger than usual sized stock pot. It adds too much time to the processing which can cause your pectin to break down, and you can also have the jelly foam up too much where it can overflow the pot.
 Place your jelly ingredients into a large stockpot fitted with a thermometer. Bring your liquid to a boil* stirring only occasionally to keep the pulp from burning on the bottom and continue to boil** until the gelling point is reached. This is 10 degrees above the boiling point of water at your elevation. For me at near sea-level, I remove my pot from the heat the moment it hits 222 degrees.
**If your jelly threatens to foam over your pot, wave a wooden spoon through the bubbles to break them up. Do not stir your jelly! Just break up the bubbles.
Work quickly to fill jars and put the lids on them, one jar at a time. Screw the rings on snugly, and turn the jars upside down. This heats the lids and ensures that you will have a good and clean seal.
 Once all jars are filled, flip each one back over carefully as they will still be hot. Set them somewhere out of the way to cool completely. Be patient, don’t try checking if they have set. If you keep messing with the jars they may not set at all! Once the jars are cool you should see that they have gelled. This can actually take a couple of days to get a complete set. Any jars that didn’t seal, or any partially filled jars, should be placed in the refrigerator for immediate use. Enjoy!


Looks delicious! I too have fond memories of eating blackberries right off the vine.
LikeLiked by 1 person
They are the best!
LikeLiked by 1 person
Is jam better than jelly? I figure that if I am going to strain the seeds out, I just strain all the pulp out too, leaving blackberry juice which makes a nice blackberry jelly. I mean, I have make jam with seeds, and seedless jelly, but not seedless jam (with pulp but without seeds). I do the same for elderberries, although I think that the ”goodies’ of elderberries might be in the pulp. For those who use elderberry as a dietary supplement, this would be an important distinction. I just make it to win a blue ribbon at the Harvest Festival.
LikeLiked by 2 people
For this I like the jam since it has more texture. It also takes a lot less time not having to strain out pulp which can be pretty slow. I have thought about entering some of my products to the local fair just to see how I would do, but always forget until it’s too late!
LikeLiked by 1 person
You might find this amusing:
https://tonytomeo.wordpress.com/2017/10/01/blue-ribbon/
LikeLiked by 1 person
Hahahaha! That was pretty darned funny! Makes me wonder what the criteria for judging is?!
LikeLiked by 1 person
I do not think that they have much criteria. There are not many entries. I want one of my young colleagues to enter elderberry jelly this year, and suspect that he has a good chance of winning a blue ribbon.
LikeLiked by 1 person
Hello just want to be clear…. for this recipe you do not have to do the hot water canning?
LikeLike
I usually don’t, which is kind of a no-no. I’m able to work pretty fast filling jars, so things are still very hot. However, you can water bath at standard times for pints, if you want to be on the safe side. That would be 10 minutes.
LikeLike
I made this old-fashioned seedless blackberry jam today. It was easy and I like that there is no added pectin. The jam came out perfectly and as it cooked and setup the blackberry flavor really developed. The jam setup fully within 4 hours. My husband liked it so much he was eating spoonfuls of it. I had to grab the jar from him. Yummy! Thanks for the great recipe, it will be my favorite going forward.
LikeLiked by 1 person
Oh my!! Thank you for your feedback!! I’m so glad you and your husband enjoyed it.
LikeLike
I just made a quart of this and was worried because I used a meat thermometer and it sat for so very long at 214F. I forgot to time it but it must have been at least 20 mins. Is that normal? Just as I was wondering if the thermometer was broken and about to just take it off the heat and jar it, it shot up to 221F, right where it was supposed to, according to your “10 degrees above boiling” per elevation. I love blackberry jam and have always had to work to ignore the seeds so can not wait to try this, Thank You!
FWIW, I used a Hurom slow juicer with the largest filter to separate the seeds and it worked SO well : ) Instead of washing the pulp I decided to just dehydrate the seed/pulp, which came out in little bar shapes, to add to wild bird seed in the deep winter. I think they will love it!
LikeLiked by 1 person
That’s a great use for the seed pulp! Yes, it’s not uncommon to have the temperature stall for a while. It has to do with water’s chemical properties and how it behaves at boiling point. I find myself staring at the thermometer impatiently waiting for it to budge!🤣
LikeLike
thank you very much for this detailed guidance! I had two 1-gallon bags of frozen blackberries from summer of 2020, and wanted to make jam or jelly without pectin, and without the billions of seeds. The tip of rinsing the seedy mass is ingenious! I planned on NOT canning, just placing into containers to freeze for future use and one for the refridgerator. I also didn’t have a thermometer; I went by the ‘sheeting off the spoon’ method and hoped for the best. My jam turned out great! I don’t think I can eat all of it on my toast or my pb sandwiches so I think I will use some to make jam-filled shortbread cookies for Christmas gifts. Thanks so much! Holly in Vermont
LikeLiked by 1 person
Awesome, I’m glad it worked out well for you! I love the flavor of the berries, but the seeds are such a pain. The cookies sound like a great gift and I’m sure they’ll turn out wonderfully. You could also use the jam in my pasta flora recipe. It’s a tart typically made with apricot preserves, but any kind of jam will work. Thanks for your wonderful review!
LikeLike
My jam never set. It’s been over 24 hrs. It worked last year but not this year. 😔
LikeLike
Oh no! There are so many things that can happen. It is still possible for it to set up, though. I’ve had jams take up to a week in the past, so hopefully it will still set for you.
LikeLike
I’ve got 7 cups of juice, would you make two batches or one. I have a huge stock pot so it wouldn’t be a problem I’m worried about jelling.
LikeLiked by 1 person
My gut instincts say to do it in two batches, anyway. I’d rather be safe than sorry. However, if you don’t mind getting a thick syrup rather than jam, you could always experiment to know for sure if your pot and stove will work. Also, if it doesn’t set, you could also cook it down like a fruit butter.
LikeLike
I should have heeded your advice, it took forever to reach 222, and it is very stiff. 7 cups juice yielded 3 cups jam. Husband likes it and said at least it won’t drip off his bread…back to the drawing board. I was using 2 different thermometers. Just to be safe.
LikeLiked by 1 person
You could empty the jam into a bowl and warm it up with just a little water to loosen it if needed. I’d do that as you use it rather than all the jars at once. Then you can put it back in the jar. You’ll need to refrigerate after that, but it should help.
LikeLike
Thanks, I’ll do that. I should have a bumper crop this year and I will try again!
LikeLiked by 1 person
Hi! Thanks for the recipe. In the past, I’ve used both commercial lemon juice and real lemon juice squeezed fresh in canning recipes. Which type should be used here?
LikeLike
The official response would be to use commercial lemon juice because it is standardized in terms of concentration and pH. The acidity is what helps to keep certain pathogens at bay. However, I use fresh lemon juice because I have lemon trees in my garden. If things are otherwise prepared appropriately, this should be fine.
LikeLike
Can you use monkfruit sweetener instead of sugar and still have the jam set up? Also how long does it last without refrigeration?
LikeLike
I’m not familiar with this sweetener, so I honestly don’t know. If the jam is properly made and sealed, it should last well over a year. I try to use my preserves within a year or so, anyway, because the flavor does diminish over time.
LikeLike
I made this a few days ago and followed your directions to the letter and they never set. At all.
This was my first time making it without pectin and I don’t know why it’s still completely liquid.
Is it able to be fixed? Thanks! Amy
LikeLiked by 1 person
I’m so sorry this didn’t work for you! There are so many variables that control how well a jam will set. The natural pectin content of the berries you used may have been lower, there could have been problems with how the thermometer was reading temperature, the liquid content may have been higher in these berries, etc. Sometimes things will set after a few days, so all may not be lost. However, if it doesn’t set properly, you could could each jar down a little more after you open it to thicken it up, or you could just call it syrup and use it for another purpose. It happens, and it really is a bummer.
LikeLike