 When was the last time you saw something like basil jelly in the grocery store? I never have, but I know it exists because my mom would make it from scratch. That’s the wonderful thing about making your own goodies is that you get to have so many options available to you.

(All links open a new page, so you won’t lose your spot when you look around! Get information on gardening and cultural traditions, recipes, stories, and more!)
Now I know that basil may not spring to your mind as the most obvious thing to make jelly out of, but with the right combination of ingredients, all sorts of possibilities come forth. The slightly spicy flavor of basil, along with sugar, and a burst of tang from vinegar create an elixir that you won’t be able to resist. It pairs so well with the saltiness in peanut butter, or buttered toast.
Some quick notes before you begin:
I have created a post that gives all the information needed for those of you that may be brand new to making jams and jellies. It also has tips for those of you who may have struggled getting good results in the past. I have removed all that information from the original instructions below, just to make things less cluttered. Check that post out here!
If you are new to canning, you should also read my post on Food Canning 101. This goes over the basics of equipment and resources that you’ll find helpful.
I have another post on the basics of using apple pectin for jams and jellies that you can use to experiment further. That link here!

Basil Jelly Recipe
Directions
For this recipe, use the following proportions for every 1 pound of apple cores and peels:- 1 1/4 c. water
- 1 cup basil, any variety, packed (I used some purple basil which gave a lovely garnet color), then coarsely chopped
For every cup of liquid extracted from the apple/basil mix you will use:
- 1/3 c. vinegar
- 3/4 c. sugar
This recipe makes approximately 2 cups of jelly (2 half-pints) per pound of apples. I usually do a double recipe to make it worth the time. You can make the juice and stop there until later by freezing or refrigerating it.
Put your apple cores and peels into a large stock-pot and simmer covered for at least 15-20 minutes. Apples should be almost soft. Add your chopped basil and mash the contents with a potato masher. Simmer for another 10 minutes and mash again. The apples should be fairly soft by now, if not, check again in another 5-10 minutes. Once the apples are soft enough to be easily mashed, give them another good mashing then turn off the heat and allow the mixture to cool in the pot for at least 30 minutes.
 Place a muslin cloth in a strainer and pour apple mixture in. (Edit: I find it much easier and more productive if I strain out the solids in a colander or strainer without the cloth first, then strain it through the cloth to remove the fine particles. Hey, you’re never too old to learn, right?) Allow to drain. Gather up ends of cloth and twist to get the last bits of juice out. Your apple “gunk” is ready for the compost pile, and if you have a good quality cloth you can wash it and use it again. At this point you have the juice for the jelly, not the jelly, yet! You can refrigerate or freeze the juice and continue with the remaining steps later, if needed.
Measure your liquid and add the appropriate amounts of vinegar and sugar. You shouldn’t process more than 4 cups of the liquid (before adding vinegar and sugar) at a time. It adds too much time to the processing which can cause your pectin to break down, and you can also have the jelly foam up too much where it can overflow the pot.
 Place your jelly mixture into a large stockpot fitted with a thermometer. Bring your liquid to a boil without stirring and continue to boil** until the gelling point is reached. This is 10 degrees above the boiling point of water at your elevation. For me at near sea-level, I remove my pot from the heat the moment it hits 222 degrees.
**If your jelly threatens to foam over your pot, wave a wooden spoon through the bubbles to break them up. Do not stir your jelly! Just break up the bubbles.
 Work quickly to fill jars and put the lids on them, one at a time. Screw the rings on snugly, and turn the jars upside down. This heats the lids and ensures that you will have a good and clean seal.
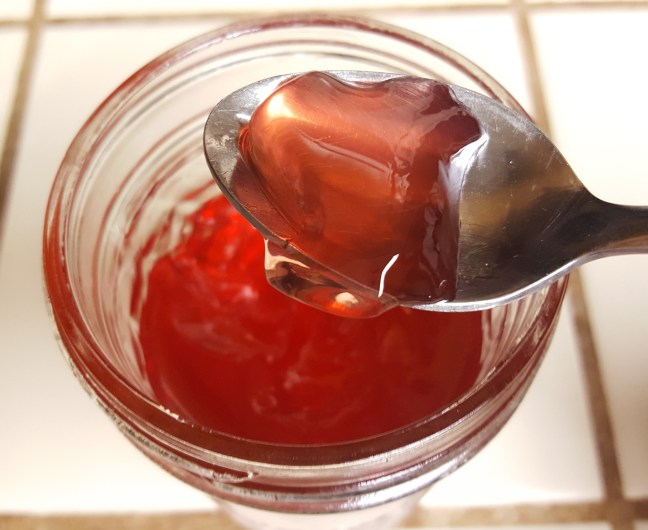
 Once all jars are filled, flip each one back over carefully as they will still be hot. At this point you can also water-bath them for 10 minutese to ensure safety. Set them somewhere out of the way to cool completely. Be patient, don’t try checking if they have set. If you keep messing with the jars they may not set at all! Once the jars are cool you should see that they have gelled. This can actually take a couple of days to get a complete set. Remove rings from lids, wipe down rims and rings with a clean, damp cloth, check that the flat lid is sealed well, and then replace rings. Any jars that didn’t seal, or any partially filled jars, should be placed in the refrigerator for immediate use. Enjoy!


5 thoughts on “Basil Jelly”